

DIY Candle Making: A Beginner's Guide
Are you looking for a new hobby that allows you to express your creativity? Look no further than candle making! Making your own candles at home is not only a fun and rewarding activity, but it also allows you to create personalized gifts for your loved ones. In this beginner's guide, we will take you through the step-by-step process of candle making, so you can start illuminating your creativity today! First things first, gather all the necessary materials. You will need wax, wicks, a double boiler, a thermometer, fragrance oils or essential oils, and containers to hold your candles. You can find these supplies at your local craft store or order them online. Once you have everything you need, it's time to get started! The first step is to melt the wax. Fill the bottom of your double boiler with water and place it on the stove over medium heat. Place the wax in the top pot of the double boiler and allow it to melt slowly. It's important to keep an eye on the temperature using a thermometer, as different types of wax have different melting points. While the wax is melting, prepare your containers. Clean them thoroughly and make sure they are dry. If you want to add color to your candles, now is the time to do so. You can use liquid or solid candle dyes, which can be mixed into the melted wax. Remember to stir the wax well to ensure an even distribution of color. Once the wax has reached the desired temperature and consistency, it's time to add fragrance. Whether you prefer floral scents or fruity aromas, there are countless fragrance oils and essential oils to choose from. Add a few drops of your chosen scent to the melted wax and stir gently to combine. Now it's time to pour the wax into your containers. Place the wicks in the center of each container and secure them in place using a wick holder or a pencil. Slowly pour the melted wax into the containers, making sure not to disturb the wicks. Leave a small amount of space at the top to allow for any shrinkage during cooling. Once you have poured the wax, it's important to let it cool and solidify completely. This process can take several hours, so be patient. Avoid moving or disturbing the candles during this time to ensure a smooth and even finish. After the candles have cooled and solidified, trim the wicks to about half an inch. This will help the candles burn evenly and prevent excessive smoke. Now your candles are ready to be lit and enjoyed! Candle making is a versatile craft that allows you to experiment with different colors, scents, and container shapes. Don't be afraid to get creative and try new combinations. With practice, you will become more confident in your candle making skills and may even develop your own signature style. So why not give candle making a try? It's a wonderful way to relax, unwind, and let your creativity shine. Whether you make candles for yourself or as gifts for others, the joy of creating something with your own hands is truly priceless. So gather your supplies, follow these steps, and let your imagination run wild. Happy candle making!Essential Candle-Making Supplies for Beginners
Are you looking for a new hobby that allows you to express your creativity? Candle making might be just the thing for you! Not only is it a fun and relaxing activity, but it also allows you to create beautiful and personalized candles that can be used for decoration or as thoughtful gifts. If you're a beginner, don't worry! In this step-by-step guide, we'll walk you through the process of making candles at home. Let's start with the essential supplies you'll need to get started. First and foremost, you'll need wax. There are several types of wax to choose from, including soy wax, beeswax, and paraffin wax. Soy wax is a popular choice among beginners because it's easy to work with and produces clean-burning candles. Beeswax, on the other hand, is a natural and sustainable option that gives off a lovely honey scent. Paraffin wax is the most common type of wax used in candle making and is known for its affordability and ability to hold fragrance well. Whichever type of wax you choose, make sure to buy it in pellet or block form for easy melting. Next, you'll need wicks. Wicks are the strings that go in the center of the candle and provide a pathway for the melted wax to be drawn up and burned. When choosing wicks, consider the size of your candle. For smaller candles, a thinner wick will suffice, while larger candles will require thicker wicks. It's also important to choose wicks that are made from natural materials, such as cotton or hemp, as they burn cleaner and produce less soot. To melt your wax, you'll need a double boiler or a melting pot. A double boiler consists of two pots, one larger than the other, that are stacked on top of each other. The larger pot is filled with water, while the smaller pot holds the wax. This setup allows the wax to melt slowly and evenly without the risk of burning. If you don't have a double boiler, you can use a melting pot specifically designed for candle making. These pots have a spout that makes pouring the melted wax into your containers much easier. Speaking of containers, you'll need something to pour your melted wax into. The options are endless when it comes to choosing containers for your candles. You can use mason jars, tea cups, or even vintage tins. Just make sure that the containers are heat-resistant and can withstand the temperature of the melted wax. It's also a good idea to clean and dry your containers before pouring the wax to ensure a smooth finish. Lastly, you'll need fragrance oils and colorants if you want scented and colored candles. Fragrance oils come in a wide variety of scents, from floral to fruity to spicy. Choose a fragrance that appeals to you and add a few drops to your melted wax. As for colorants, you can use liquid dyes or color blocks specifically made for candle making. Start with a small amount and gradually add more until you achieve your desired color. Now that you have all the essential supplies, you're ready to start making candles! In the next section of this guide, we'll walk you through the process of melting the wax and pouring it into your containers. Get ready to unleash your creativity and illuminate your space with beautiful homemade candles!Step-by-Step Candle Making Tutorial for Homemade Candles
Are you looking for a fun and creative project to do at home? Why not try making your own candles? Not only is candle making a great way to express your creativity, but it also allows you to create personalized and unique gifts for your loved ones. In this step-by-step tutorial, we will guide you through the process of making homemade candles. First, gather all the necessary materials. You will need wax, wicks, a double boiler, a thermometer, fragrance oils or essential oils, and candle molds or containers. You can find these materials at your local craft store or order them online. Once you have everything ready, it's time to start making your candles. Step 1: Prepare your workspace. Find a clean and well-ventilated area where you can work comfortably. Cover your work surface with newspaper or a plastic tablecloth to protect it from any spills or drips. Step 2: Melt the wax. Fill the bottom of your double boiler with water and place it on the stove over medium heat. Place the wax in the top pot of the double boiler and allow it to melt slowly. Stir occasionally to ensure even melting. Use a thermometer to monitor the temperature of the wax. The ideal temperature for most waxes is between 160 and 180 degrees Fahrenheit. Step 3: Add fragrance. Once the wax has melted, remove it from the heat and let it cool slightly. Add your chosen fragrance oil or essential oil to the melted wax and stir well to ensure it is evenly distributed. The amount of fragrance oil you add will depend on your personal preference and the strength of the oil. Start with a small amount and add more if desired. Step 4: Prepare the molds or containers. While the wax is cooling, prepare your molds or containers. If you are using candle molds, make sure they are clean and dry. If you are using containers, such as mason jars or teacups, ensure they are clean and free from any dust or debris. Place a wick in the center of each mold or container, making sure it is straight and centered. Step 5: Pour the wax. Slowly pour the melted wax into the molds or containers, taking care not to disturb the wick. Leave a small amount of space at the top to allow for any shrinkage during cooling. If you are using molds, you may need to secure the wick in place using a wick holder or pencil. Step 6: Let the candles cool and set. Allow the candles to cool and set undisturbed for several hours or overnight. The cooling time will depend on the size and type of candle you are making. Once the candles have hardened, trim the wick to about ¼ inch. Step 7: Enjoy your homemade candles. Once the candles are fully set and the wicks trimmed, they are ready to be enjoyed. Light them up and bask in the warm and cozy glow of your own handmade creations. You can also gift them to friends and family, spreading the joy of homemade candles. Candle making is a wonderful way to unleash your creativity and create beautiful and personalized candles. With this step-by-step guide, you can easily make your own candles at home. So gather your materials, set up your workspace, and let your imagination run wild. Illuminate your creativity with homemade candles!Creative Candle Craft Ideas to Try at Home
Are you looking for a fun and creative activity to try at home? Look no further than candle making! Making your own candles is not only a great way to relax and unwind, but it also allows you to express your creativity and create unique and personalized candles that can be used for decoration or as thoughtful gifts for friends and family. In this article, we will guide you through the step-by-step process of candle making at home, and also share some creative candle craft ideas to inspire you. To start your candle making journey, you will need a few basic supplies. First and foremost, you will need wax. There are various types of wax available, such as soy wax, beeswax, and paraffin wax. Choose the one that suits your preferences and budget. You will also need a wick, which is the string that burns and provides the flame. Make sure to choose a wick that is appropriate for the size of your candle. Other supplies you will need include a double boiler or a heat-resistant container to melt the wax, a thermometer to monitor the temperature, and fragrance oils or essential oils to add a pleasant scent to your candles. Once you have gathered all your supplies, it's time to start the candle making process. Begin by melting the wax in a double boiler or a heat-resistant container. It's important to monitor the temperature of the wax using a thermometer to ensure it doesn't get too hot. Once the wax has melted, you can add your chosen fragrance oils or essential oils to give your candles a delightful scent. Stir the mixture gently to distribute the fragrance evenly. Next, prepare your candle molds or containers. You can use traditional candle molds or get creative with containers such as mason jars, teacups, or even seashells. Place the wick in the center of the mold or container and secure it in place using a wick holder or by tying it to a pencil or chopstick placed across the top of the container. This will ensure that the wick stays centered as the wax cools and solidifies. Carefully pour the melted wax into the molds or containers, making sure to leave a small space at the top. Allow the candles to cool and solidify completely. This process may take a few hours, so be patient. Once the candles have hardened, trim the wick to a suitable length, leaving about half an inch above the wax. Now that you have mastered the basics of candle making, it's time to get creative! There are countless ways to personalize your candles and make them truly unique. You can experiment with different colors by adding candle dyes or even natural ingredients such as spices or flower petals to the melted wax. You can also create beautiful patterns by layering different colored waxes or by using techniques such as marbling or swirling. Another fun idea is to embed objects into your candles. You can place small trinkets, dried flowers, or even photographs inside the mold before pouring the wax. This adds a special touch and makes the candles even more meaningful. So, why not give candle making a try? It's a wonderful way to unleash your creativity and create beautiful and personalized candles that will bring warmth and light to any space. Whether you're making candles for yourself or as gifts for loved ones, the process is both enjoyable and rewarding. So gather your supplies, let your imagination run wild, and start creating your own unique candles today!Tips for Making Handmade Candles with Unique Designs
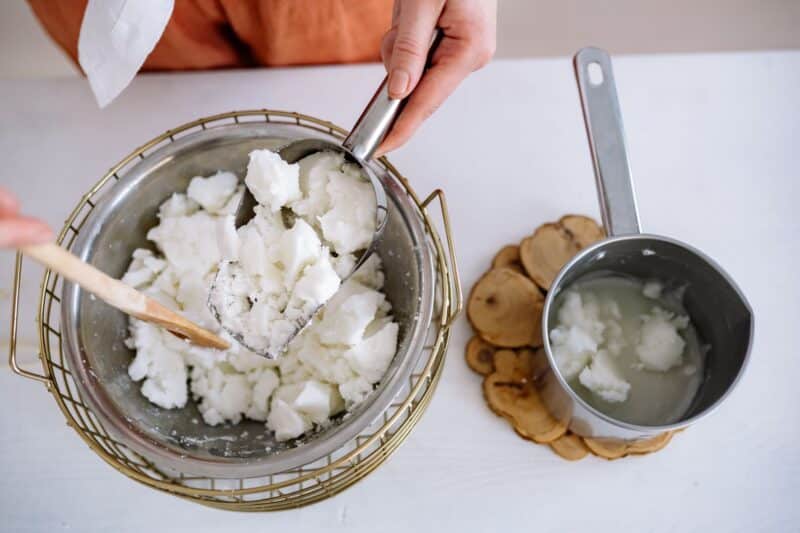 Are you looking for a new hobby that allows you to express your creativity? Look no further than candle making! Making handmade candles with unique designs is not only a fun and relaxing activity, but it also allows you to create beautiful and personalized gifts for your loved ones. In this section, we will provide you with some tips to help you get started on your candle making journey.
First and foremost, it's important to gather all the necessary materials before you begin. You will need wax, wicks, a double boiler, a thermometer, fragrance oils or essential oils, and any desired colorants or additives. You can easily find these supplies at your local craft store or order them online. Once you have everything you need, you're ready to dive into the world of candle making!
The next step is to prepare your work area. It's essential to have a clean and clutter-free space to ensure a smooth and enjoyable candle making experience. Lay down some newspaper or a plastic tablecloth to protect your surfaces from any potential spills or messes. Additionally, make sure you have all your tools and materials within reach for easy access.
Now it's time to melt the wax. Fill the bottom of your double boiler with water and place it on the stove over medium heat. Place the wax in the top pot of the double boiler and allow it to melt slowly. It's important to monitor the temperature of the wax using a thermometer to ensure it doesn't get too hot. Different types of wax have different melting points, so be sure to follow the instructions provided with your specific wax.
Once the wax has melted, it's time to add fragrance oils or essential oils to give your candles a delightful scent. Be sure to use oils specifically designed for candle making, as other types of oils may not burn properly. Start by adding a small amount of oil and gradually increase the scent until you achieve your desired fragrance level. Remember, a little goes a long way!
If you want to add color to your candles, now is the time to do so. You can use liquid dyes or color blocks specifically made for candle making. Start with a small amount and gradually add more until you achieve your desired color. Remember to stir the wax thoroughly to ensure the color is evenly distributed.
Before pouring the wax into your chosen containers, it's important to prepare the wicks. Cut the wicks to the desired length, leaving a little extra to secure them to the bottom of the container. You can use a hot glue gun or a small amount of melted wax to adhere the wick to the container. Make sure the wick is centered and straight before pouring the wax.
Now it's time to pour the wax into your containers. Be careful not to overfill them, as the wax may overflow when it solidifies. Leave a small amount of space at the top to allow for any shrinkage. Allow the candles to cool and solidify completely before trimming the wicks to the desired length.
Voila! You have successfully made your own handmade candles with unique designs. Now you can enjoy the warm glow and delightful scents of your creations or share them with your loved ones as thoughtful and personalized gifts. Candle making is a wonderful way to unleash your creativity and add a touch of warmth and ambiance to any space. So go ahead, illuminate your creativity and start making your own candles at home today!
Are you looking for a new hobby that allows you to express your creativity? Look no further than candle making! Making handmade candles with unique designs is not only a fun and relaxing activity, but it also allows you to create beautiful and personalized gifts for your loved ones. In this section, we will provide you with some tips to help you get started on your candle making journey.
First and foremost, it's important to gather all the necessary materials before you begin. You will need wax, wicks, a double boiler, a thermometer, fragrance oils or essential oils, and any desired colorants or additives. You can easily find these supplies at your local craft store or order them online. Once you have everything you need, you're ready to dive into the world of candle making!
The next step is to prepare your work area. It's essential to have a clean and clutter-free space to ensure a smooth and enjoyable candle making experience. Lay down some newspaper or a plastic tablecloth to protect your surfaces from any potential spills or messes. Additionally, make sure you have all your tools and materials within reach for easy access.
Now it's time to melt the wax. Fill the bottom of your double boiler with water and place it on the stove over medium heat. Place the wax in the top pot of the double boiler and allow it to melt slowly. It's important to monitor the temperature of the wax using a thermometer to ensure it doesn't get too hot. Different types of wax have different melting points, so be sure to follow the instructions provided with your specific wax.
Once the wax has melted, it's time to add fragrance oils or essential oils to give your candles a delightful scent. Be sure to use oils specifically designed for candle making, as other types of oils may not burn properly. Start by adding a small amount of oil and gradually increase the scent until you achieve your desired fragrance level. Remember, a little goes a long way!
If you want to add color to your candles, now is the time to do so. You can use liquid dyes or color blocks specifically made for candle making. Start with a small amount and gradually add more until you achieve your desired color. Remember to stir the wax thoroughly to ensure the color is evenly distributed.
Before pouring the wax into your chosen containers, it's important to prepare the wicks. Cut the wicks to the desired length, leaving a little extra to secure them to the bottom of the container. You can use a hot glue gun or a small amount of melted wax to adhere the wick to the container. Make sure the wick is centered and straight before pouring the wax.
Now it's time to pour the wax into your containers. Be careful not to overfill them, as the wax may overflow when it solidifies. Leave a small amount of space at the top to allow for any shrinkage. Allow the candles to cool and solidify completely before trimming the wicks to the desired length.
Voila! You have successfully made your own handmade candles with unique designs. Now you can enjoy the warm glow and delightful scents of your creations or share them with your loved ones as thoughtful and personalized gifts. Candle making is a wonderful way to unleash your creativity and add a touch of warmth and ambiance to any space. So go ahead, illuminate your creativity and start making your own candles at home today!


